Indulge in a decadent Chocolate Truffle Tart with silky
Indulge in the Richness of Chocolate Truffle Tart
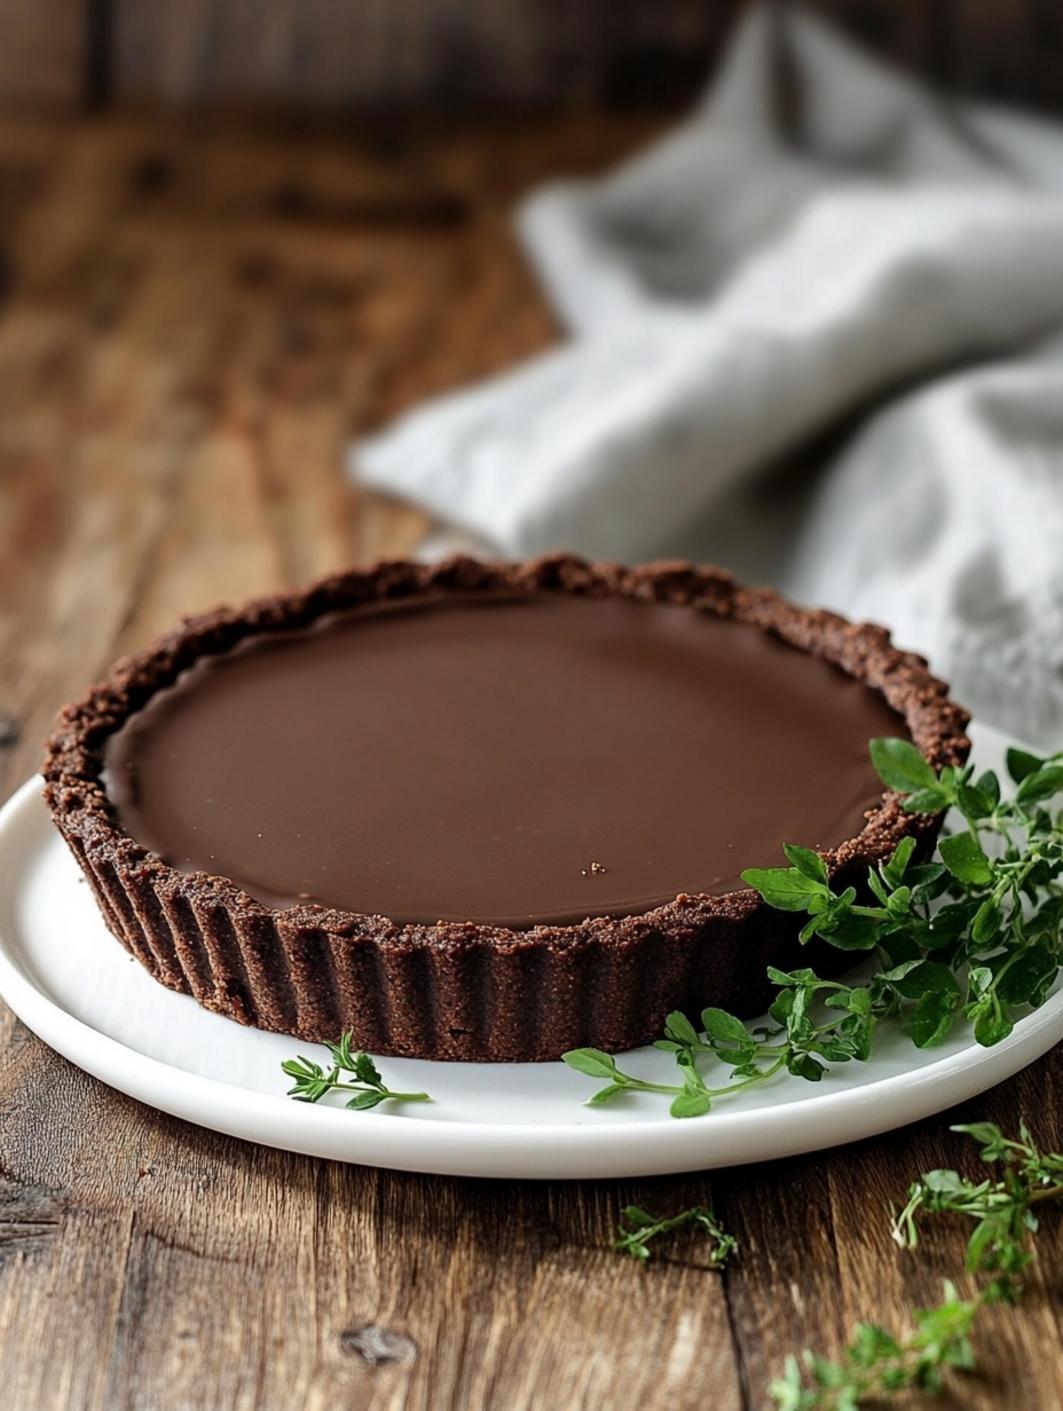
There’s something inherently luxurious about a chocolate truffle tart. This delicious dessert consists of a buttery crust filled with a smooth, silky chocolate ganache. The layers of flavor and texture create an experience that is nothing short of extraordinary. Not only is it a showstopper for dinner parties, but it’s also a delightful way to treat yourself after a long day. In this post, we will take you through the luscious process of creating a chocolate truffle tart that will leave your taste buds dancing with joy. Whether you’re an experienced baker or a novice in the kitchen, this recipe is designed to be both approachable and rewarding. Now, let’s dive into the wonderful reasons you’ll want to make this Chocolate Truffle Tart Recipe.5 Reasons to Make Chocolate Truffle Tart Recipe
1. **Elegant Presentation:** When you serve a chocolate truffle tart, it looks like a masterpiece. The glossy ganache gleaming on top of the tart is sure to impress your guests. A simple dusting of cocoa powder or a few fresh berries for garnish enhances the visual appeal.
2. **Simplistic Ingredients:** This recipe requires minimal, high-quality ingredients, allowing the chocolate to shine. You only need a few pantry staples, yet the end result is a sophisticated dessert that tastes as though it came from a fine dining restaurant.
3. **Versatile Pairings:** The rich chocolate flavor of the tart makes it extremely versatile. Pair it with a scoop of vanilla ice cream, a dollop of whipped cream, or even a drizzle of raspberry coulis to elevate the experience.
4. **Perfect for Any Occasion:** Whether it’s a holiday celebration or a simple weeknight treat, this chocolate truffle tart fits the bill perfectly. It’s an excellent dessert for birthdays, anniversaries, or even a romantic dinner.
5. **Easy to Make Ahead:** Chocolate truffle tart can be prepared in advance, allowing you to save time on the day of an event. It can be stored in the fridge for a few days, making it a convenient dessert option. Now that you’re sold on making this fantastic tart, let’s explore the ingredients in detail.
Ingredient Deep-Dive
1. **Chocolate (Dark or Semi-Sweet):** The star of the show! Choose high-quality chocolate for the best flavor. Dark chocolate provides a rich and slightly bitter contrast, while semi-sweet chocolate will yield a sweeter ganache.
2. **Heavy Cream:** Heavy cream is vital for creating that luxurious texture in the ganache. It helps balance the intensity of the chocolate and adds a silky mouthfeel.
3. **Butter:** Use unsalted butter in the crust as well as in the ganache for added richness and depth. The butter helps create a perfect crumbly crust.
4. **Sugar:** Granulated sugar sweetens both the crust and the ganache. You can adjust the amount based on your sweetness preference.
5. **Eggs:** If you’re adding a touch of custard to the filling, eggs will provide structure and an additional layer of richness.
6. **Vanilla Extract:** A splash of vanilla extract enhances the chocolate’s flavor, creating a more complex taste profile. With all these ingredients in mind, let’s jump into the step-by-step process of creating your very own chocolate truffle tart.
Step-by-Step Chocolate Truffle Tart Recipe
1. **Prepare the Tart Shell:** – Preheat your oven to 350°F (175°C). – In a large bowl, combine 1 ¼ cups of all-purpose flour, ½ cup of unsweetened cocoa powder, and ½ cup of sugar. – Cut in ½ cup of unsalted butter until the mixture resembles coarse crumbs. – Stir in 1 egg yolk and 3 tablespoons of cold water until the dough comes together. – Press the dough into a tart pan and refrigerate for 30 minutes.
2. **Blind Bake the Crust:** – Cover the crust with parchment paper and fill it with pie weights or dried beans. – Bake in the preheated oven for about 15 minutes. – Remove the weights and parchment, then bake for an additional 10-12 minutes until firm. Allow it to cool.
3. **Make the Ganache:** – In a saucepan, heat 1 cup of heavy cream over medium heat until it’s just about to boil. – Remove from heat and add 8 oz. of chopped dark or semi-sweet chocolate along with 2 tablespoons of unsalted butter and 1 teaspoon of vanilla extract. – Let it sit for a minute before whisking until smooth.
4. **Assemble the Tart:** – Pour the ganache into the cooled tart shell, ensuring it’s evenly spread. – Refrigerate for at least 2 hours, or until the ganache is set.
5. **Serve and Enjoy:** – Before serving, dust with cocoa powder or garnish with berries. – Slice and enjoy the decadent richness of your chocolate truffle tart!
Pro Tips for Perfecting Your Chocolate Truffle Tart
– **Use High-Quality Chocolate:** The flavor of your tart will only be as good as the chocolate you use. Aim for chocolate that you enjoy eating on its own.
– **Let the Ganache Cool Before Pouring:** Allow the ganache to cool slightly so that it doesn’t melt the tart shell when poured.
– **Use a Cake Ring for Precision:** For a more professional appearance, consider using a cake ring when assembling your tart to ensure a clean, even result.
– **Chill the Tart:** Patience is key! Allow your chocolate truffle tart to chill in the fridge to set properly for the best texture.
– **Experiment with Flavors:** Don’t be afraid to infuse flavors into your ganache, such as orange zest or espresso, for a unique twist.
Common Mistakes to Avoid
– **Overbaking the Crust:** Keep an eye on your crust while it’s baking; a dry crust will detract from the overall texture.
– **Skipping the Chilling Step:** Skipping the refrigeration time can result in a soft, messy tart instead of the desired firm texture.
– **Choosing the Wrong Pan:** A tart pan with a removable bottom is best for easy serving. Avoid using a regular pie pan.
– **Not Using Room Temperature Ingredients:** Ingredients that are at room temperature will incorporate better, leading to a smoother consistency.
– **Rushing the Ganache:** Allow the heavy cream to heat properly before mixing it with chocolate to ensure a smooth ganache.
FAQs about Chocolate Truffle Tart
**Can I use milk chocolate instead of dark?** Yes, you can use milk chocolate. Keep in mind that it will result in a much sweeter tart. Adjust the sugar in your crust as needed.
**How long can I store the chocolate truffle tart?** The tart can be stored in the refrigerator for up to a week. Ensure it is well-covered to maintain freshness.
**Can I freeze the chocolate truffle tart?** Yes, you can freeze it before adding any toppings. Wrap it tightly in plastic wrap and aluminum foil, and it should last a few months in the freezer.
**What can I serve with chocolate truffle tart?** Consider serving it with fresh whipped cream, vanilla ice cream, or even a fruit compote for a burst of acidity that balances the richness.
**Is it possible to modify the flavors?** Absolutely! Feel free to add extracts, spices, or even flavored liqueurs to create your own signature chocolate truffle tart.
Chocolate Truffle Tart
PREP
20 minutes
20 minutes
COOK
25 minutes
25 minutes
YIELD
8 servings
8 servings
INGREDIENTS
- 1 ¼ cups all-purpose flour
- ½ cup unsweetened cocoa powder
- ½ cup granulated sugar
- ½ cup unsalted butter, softened
- 1 egg yolk
- 3 tablespoons cold water
- 1 cup heavy cream
- 8 oz. dark or semi-sweet chocolate, chopped
- 2 tablespoons unsalted butter
- 1 teaspoon vanilla extract
- Cocoa powder for dusting (optional)
INSTRUCTIONS
- Preheat oven to 350°F (175°C).
- In a bowl, combine flour, cocoa powder, and sugar. Cut in butter until crumbly. Stir in egg yolk and water until dough forms. Press into tart pan and refrigerate for 30 minutes.
- Blind bake with parchment and weights for 15 minutes, then bake without for another 10-12 minutes. Cool.
- Heat cream in a saucepan until just boiling. Remove from heat, add chocolate and butter, and let sit. Whisk until smooth.
- Pour ganache into cooled tart shell and refrigerate for at least 2 hours.
- Dust with cocoa powder before cutting and serving.